 Naa Songs
Epoxy resin stands out as a flexible and alluring material embraced by both artists and individuals passionate about do-it-yourself (DIY) projects. Whether you’re a seasoned artist or a beginner looking to explore new creative outlets, epoxy resin offers a unique and exciting way to bring your ideas to life. In this comprehensive guide, we will delve into the fascinating world of DIY epoxy resin art, covering everything from the basics to advanced techniques.
Understanding Epoxy Resin
Epoxy resin is a two-part liquid polymer that, when mixed together, undergoes a chemical reaction, transforming into a solid, durable, and glossy material. It is commonly used as a protective coating for various surfaces, but its popularity has soared in the art community for its ability to create stunning, glossy finishes on a variety of projects.
Materials You’ll Need
Before diving into your epoxy resin art project, gather the following materials:
- Epoxy Resin Kit: Purchase a high-quality epoxy resin kit that includes both the resin and hardener. Ensure that the kit is suitable for the type of project you have in mind.
- Protective Gear: Wear gloves, a mask, and safety glasses to protect yourself from potential skin and respiratory irritation caused by the resin.
- Mixing Tools: Use disposable cups, stir sticks, and measuring tools for accurate and thorough mixing.
- Substrate: Choose a substrate for your project, such as canvas, wood, or any other surface that suits your vision.
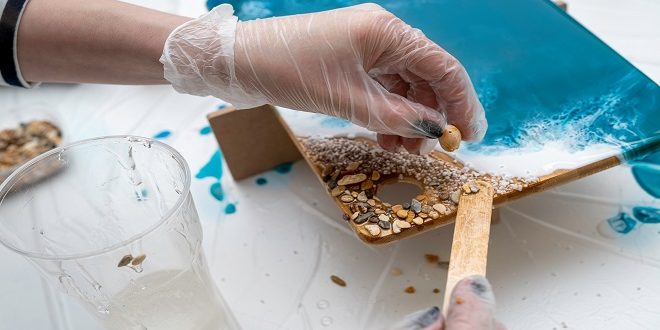
- Pigments and Inclusions: Enhance your artwork with pigments, dyes, glitters, or other inclusions to add depth and character to your resin masterpiece.
- Heat Gun or Torch: Eliminate air bubbles from the resin surface using a heat gun or torch.
The Basic Process
- Prepare Your Workspace:
- Set up a well-ventilated and clean workspace. Cover surfaces with plastic sheets or newspaper to protect them from spills.
- Measure and Mix:
- Follow the instructions on your epoxy resin kit to measure the correct ratio of resin to hardener. Thoroughly mix the two components in a disposable cup, stirring for at least two minutes to ensure a complete blend.
- Add Pigments and Inclusions:
- If desired, add pigments or inclusions to the resin mixture.
- Explore a variety of hues and textures to attain the specific effect you’re aiming for. Mix these additions evenly into the resin.
- Pour and Spread:
- Carefully pour the resin mixture onto your chosen substrate. Use a spreader or a gloved hand to evenly distribute the resin, covering the entire surface. Take your time to ensure a smooth and consistent application.
- Eliminate Bubbles:
- Apply a heat gun or torch to the resin surface to eliminate any trapped air bubbles. This step is crucial for achieving a flawless, glass-like finish.
- Let it Cure:
- Let the resin cure as per the guidelines provided by the manufacturer. Avoid disturbing the project during the curing process to prevent imperfections.
- Advanced Techniques
Once you’ve mastered the basics, consider experimenting with advanced techniques to elevate your epoxy resin art:
- Layering:
- Create depth in your artwork by pouring multiple layers of resin. Allow each layer to partially cure before adding the next, building intricate designs or encapsulating objects within the layers.
9.Resin Geodes:
- Mimic the mesmerizing beauty of geodes by using various pigments and metallic powders to create intricate patterns and textures within the resin.
10.Resin Petri Dishes:
- Explore the mesmerizing world of resin petri dishes by dropping pigments into the resin and manipulating them to form unique and organic shapes.
- Alcohol Ink Effects:
- Combine alcohol inks with epoxy resin for vibrant and unpredictable patterns. Experiment with different alcohol ink techniques to achieve stunning and dynamic results.
- Incorporate Texture:
- Add texture to your resin art by embedding materials like fabric, paper, or dried flowers. This not only creates visual interest but also enhances the tactile experience of your artwork.
Tips and Troubleshooting
Work Quickly:
- Epoxy resin has a limited working time, so it’s essential to work efficiently. Plan your design beforehand and have all materials within reach.
Protective Measures:
- Prioritize safety by wearing protective gear. In case of skin contact, clean immediately with soap and water.
Experiment and Learn:
- Embrace the learning curve. Experiment with small projects to understand how resin behaves and discover your unique style.
Troubleshooting Blemishes:
- If your cured resin has imperfections, such as dust particles or uneven surfaces, you can sand and polish the final piece for a smooth, professional finish.
Conclusion
Embarking on a DIY epoxy resin art project opens the door to endless creative possibilities. From mesmerizing abstract pieces to functional items like coasters and tabletops, epoxy resin allows you to transform ordinary materials into extraordinary works of art. By understanding the basics, exploring advanced techniques, and embracing a spirit of experimentation, you’ll unlock the full potential of epoxy resin and unleash your creativity in ways you never thought possible. So, gather your materials, set up your workspace, and let the epoxy resin journey begin!